在 VS Code 中设置 GitHub Copilot
本指南将引导你完成在 Visual Studio Code 中设置 GitHub Copilot 的过程。要在 VS Code 中使用 Copilot,你需要通过你的 GitHub 帐户访问 GitHub Copilot。
按照以下步骤开始在 VS Code 中使用 Copilot
-
将鼠标悬停在状态栏中的 Copilot 图标上,然后选择“使用 AI 功能”。
-
选择一种登录方法,然后按照提示操作。
-
如果你的帐户已有 Copilot 订阅,VS Code 将使用该订阅。
-
如果你尚未拥有 Copilot 订阅,你将被注册到 Copilot 免费计划,每月将获得一定的行内建议和聊天交互限制。详细了解不同的 GitHub Copilot 计划。
-
-
开始在 VS Code 中使用 Copilot!
通过 Copilot 快速入门学习基础知识。
你当前使用的 GitHub Copilot 免费版本启用了遥测。默认情况下,允许与公共代码匹配的代码建议,包括 VS Code 和 github.com 体验中的代码引用。你可以通过将 VS Code 中的 telemetry.telemetryLevel 设置为 off 来选择退出遥测数据收集,或者你可以在 Copilot 设置中调整遥测和代码建议设置。
将 Copilot 与 GHE 帐户一起使用
如果你的 Copilot 订阅与 GitHub Enterprise (GHE) 帐户相关联,你可以使用 GHE 凭据登录 VS Code 中的 Copilot。
-
如果尚未执行此操作,请将鼠标悬停在状态栏中的 Copilot 图标上,然后选择“使用 AI 功能”。
-
在登录对话框中,选择“使用 GHE.com 继续”,然后提供你的 GHE 实例 URL 和凭据。
如果你需要切换 GitHub.com 帐户和 GHE 帐户,请参阅 为每个工作区或配置文件使用不同的 GitHub 帐户 以获取说明。
将不同的 GitHub 帐户用于 Copilot
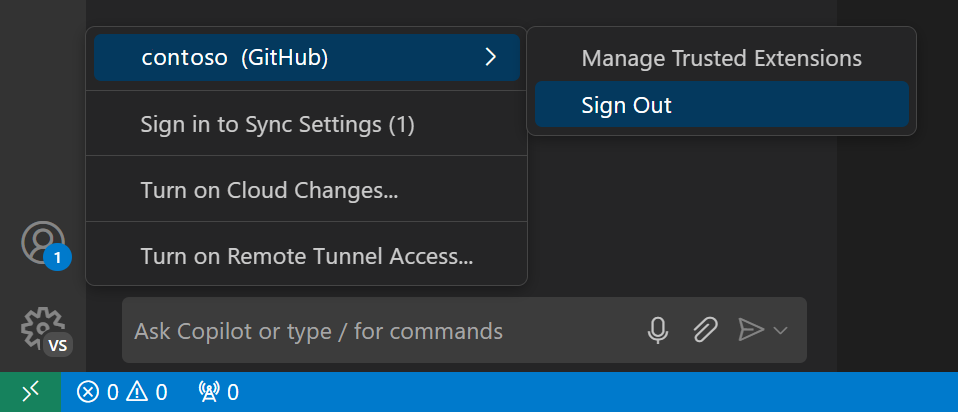
如果你的 Copilot 订阅与另一个 GitHub 帐户相关联,请按照以下步骤在 VS Code 中注销你的 GitHub 帐户,然后使用另一个帐户登录。
-
在活动栏中选择“帐户”菜单,然后选择“注销”当前登录的帐户。
-
使用以下任一方法登录你的 GitHub 帐户
-
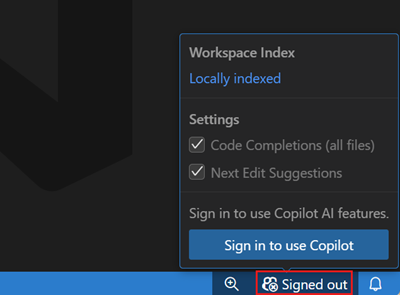
从状态栏中的 Copilot 菜单中选择“登录以使用 Copilot”。
-
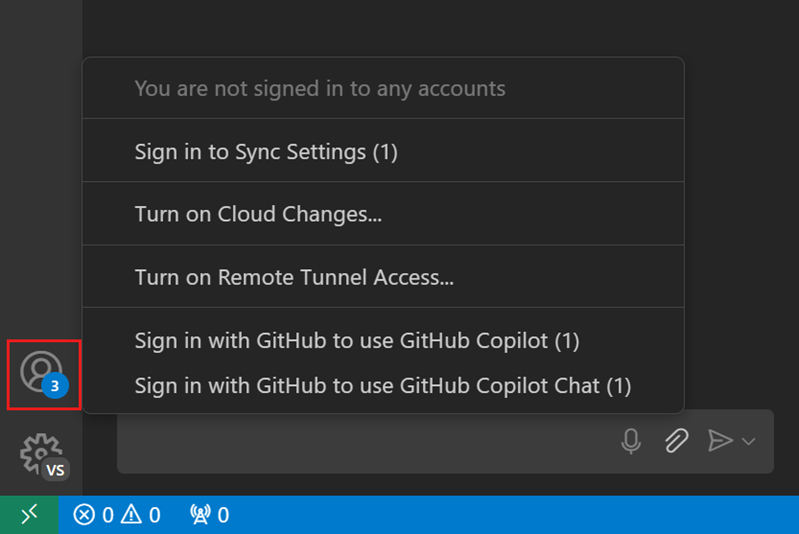
在活动栏中选择“帐户”菜单,然后选择“使用 GitHub 登录以使用 GitHub Copilot”。
-
在命令面板中运行“GitHub Copilot: Sign in”命令(⇧⌘P (Windows, Linux Ctrl+Shift+P))。
-
为每个工作区或配置文件使用不同的 GitHub 帐户
你可以为每个 VS Code 工作区或配置文件使用不同的 GitHub 帐户来使用 Copilot。如果你在工作和个人项目中使用不同的帐户,或者想为使用 GitHub 身份验证的不同扩展使用不同的帐户,则此功能很有用。
按照以下步骤配置要用于 Copilot 的 GitHub 帐户。此配置将按工作区和配置文件保存。
-
对于 GitHub.com 帐户
- 在活动栏的“帐户”菜单中,选择“管理扩展帐户首选项”
- 从扩展列表中选择“GitHub Copilot Chat”
- 选择要在当前工作区和配置文件中用于 Copilot 的 GitHub 帐户
-
对于 GHE.com 帐户
提示如果你只想为 Copilot 使用 GHE 帐户,请按照 将 Copilot 与 GHE 帐户一起使用中的步骤使用你的 GHE 帐户登录。
-
在命令面板(⇧⌘P (Windows, Linux Ctrl+Shift+P))中运行“首选项: 打开用户设置 (JSON)”或“首选项: 打开工作区设置 (JSON)”
-
添加以下设置,将 GitHub Enterprise 指定为 Copilot 的身份验证提供程序
"github.copilot.advanced": { "authProvider": "github-enterprise" } -
重新登录你的 GitHub Enterprise 帐户(如果你尚未登录)
-
从 VS Code 中移除 AI 功能
您可以使用 chat.disableAIFeatures 设置在 VS Code 中禁用内置的 AI 功能,这与您在 VS Code 中配置其他功能的方式类似。这将禁用并隐藏 VS Code 中的聊天或内联建议等功能,并禁用 Copilot 扩展。您可以在工作区或用户级别配置此设置。
或者,从标题栏的聊天菜单中使用了解如何隐藏 AI 功能操作来访问此设置。
如果您之前已禁用内置 AI 功能,在更新到新版本的 VS Code 时,您的选择将得到尊重。
为工作区禁用 AI 功能
要为特定工作区禁用 AI 功能,请在工作区设置中配置 chat.disableAIFeatures 设置。此设置可在设置编辑器(⌘, (Windows, Linux Ctrl+,))中找到,或者你可以编辑工作区中的 settings.json 文件。
后续步骤
- 继续进行 AI 使用快速入门,以发现 VS Code 中 AI 驱动开发的关键功能。